An Interview with Alison Reid, Author of Stitch Magic

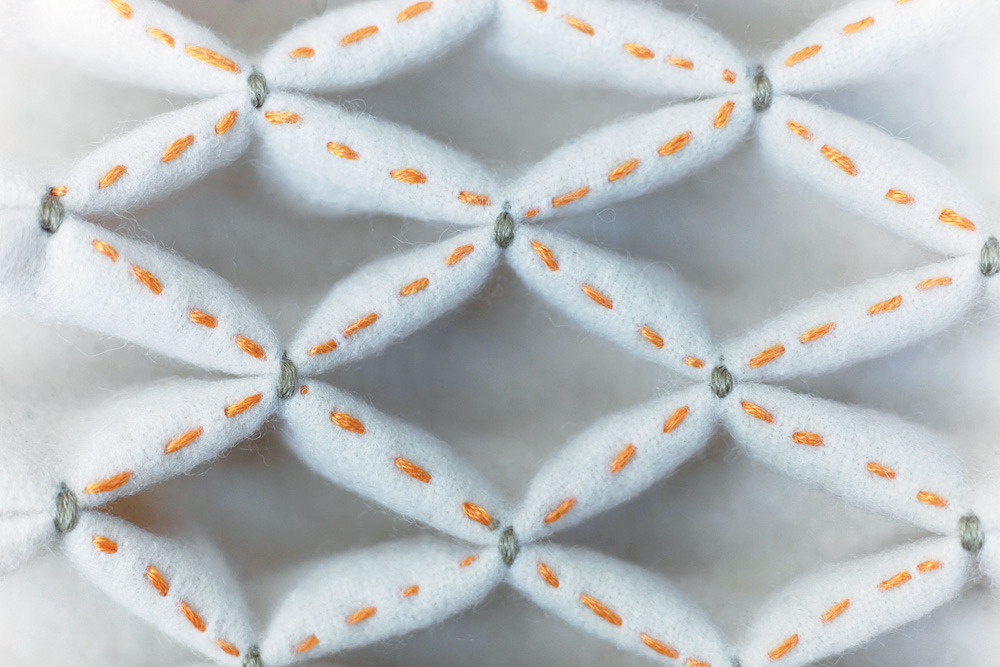
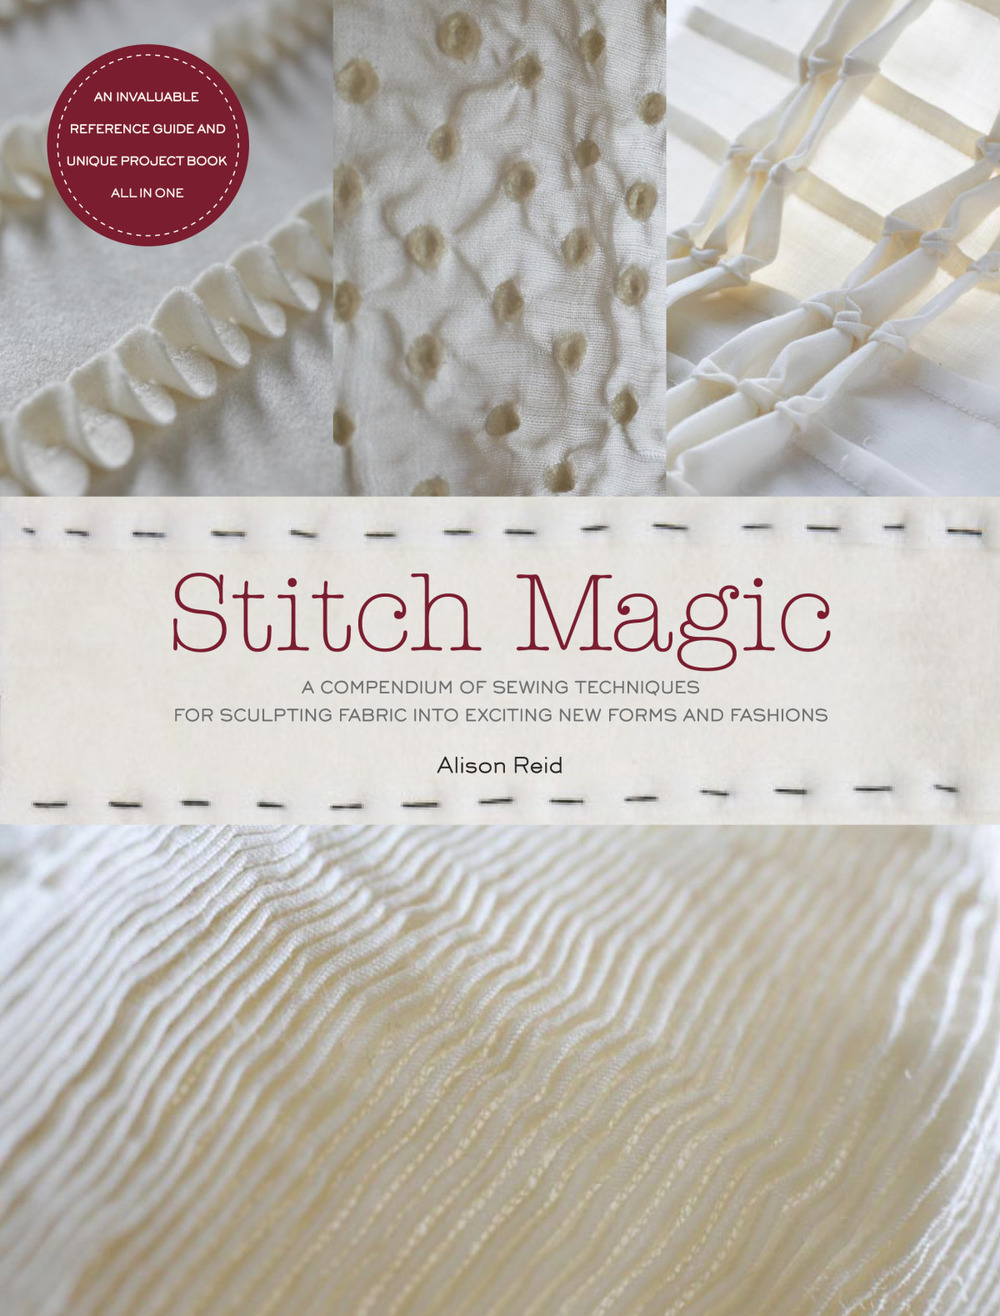
We wrapped up our Stitch Magic Stitch-Along last week and I'd say it was a rousing success. I now have several new skills under my belt to incorporate into my sewing projects, like smocking, pintucks, and cording. But the most inspiring thing for me was following Stitch Magic author Alison Reid's experimentations with fabric. I love her non-fussy, freeform techniques. I was lucky enough to do an interview with Alison and ask her some of my burning questions. I hope you enjoy it--and I very much hope you enjoyed the stitch-along!


What is your process like when developing your techniques? I imagine a lot of experimentation is involved.

 
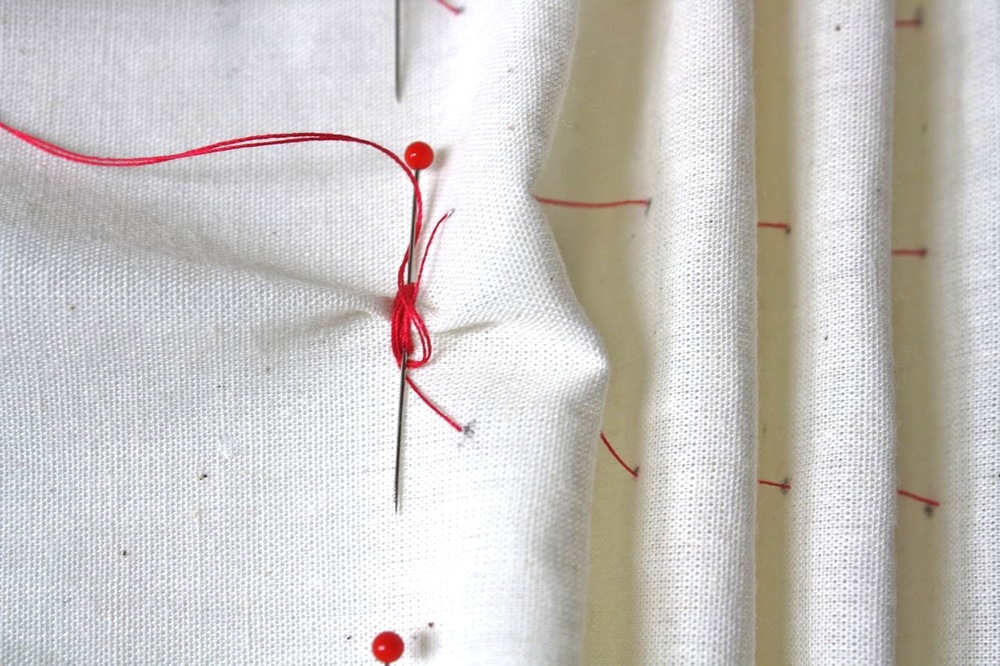
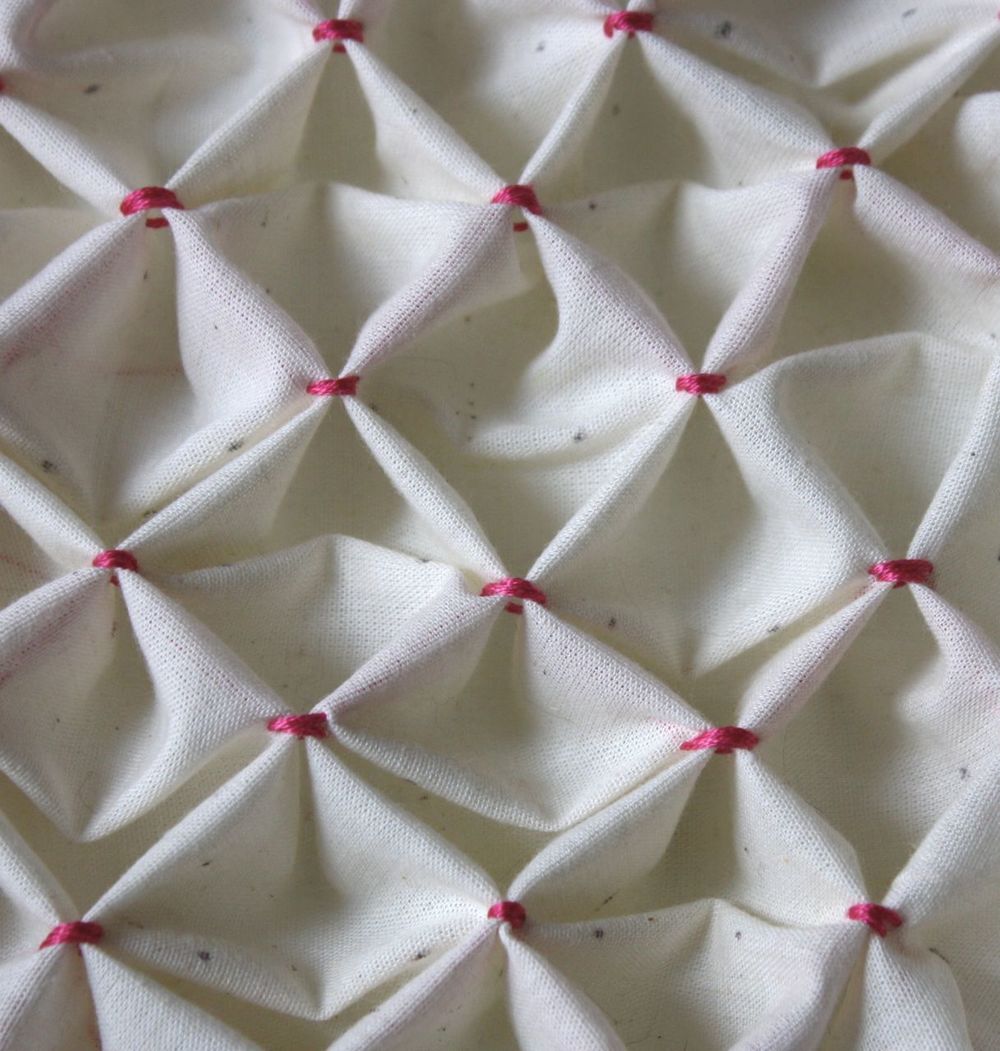
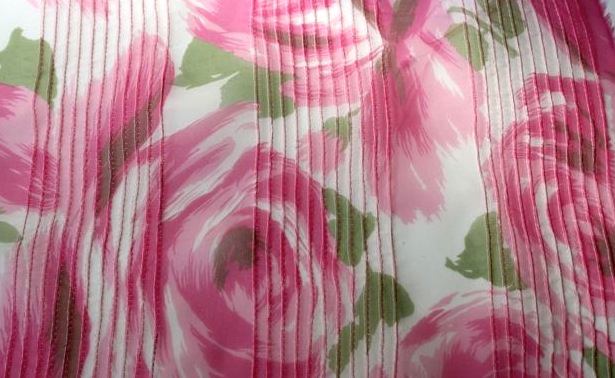
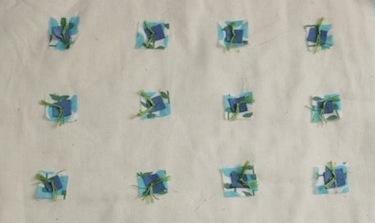
I start by buying fabric, often it’s fabric that might be slightly unusual-looking. As I wrote in my book I live with it for a while and handle it. By doing this the fabric almost dictates what can be done with it. I never just launch myself in, I always have to appreciate the fabric first. Once I get going it’s just a matter of experimenting. Once I hit on an idea another one will follow. In other words, one thing informs the next.

How would you describe your philosophy when it comes to sewing and fabric manipulation?

 
I don’t actually have a philosophy. This creates boundaries and takes control. I have no rules; it’s all about how you feel and see things. It’s important to be creative and to be experimental. I am an art teacher as well as an author. One thing I always tell the children in my class is never be afraid to take risks. Be experimental, try new things, and never be afraid to make a mistakes. Mistakes do happen, but I find that often something great can happen out of a mistake.

What's your sewing background? Do you have traditional sewing training?


I attended art school in the 1980s and studied fashion and textiles. I specialized in woven textiles and my focus was weaving fabrics for interiors. The weaving process taught me a lot about patience and concentration. Dressing and setting up a loom could take days; you really had to be patient during that process. After finishing my own studies I taught for 20 years and it was during that time that I was sent to train in sewing at Manchester Metropolitan University.

Do you have any advice for readers looking to incorporate your techniques into garment sewing?


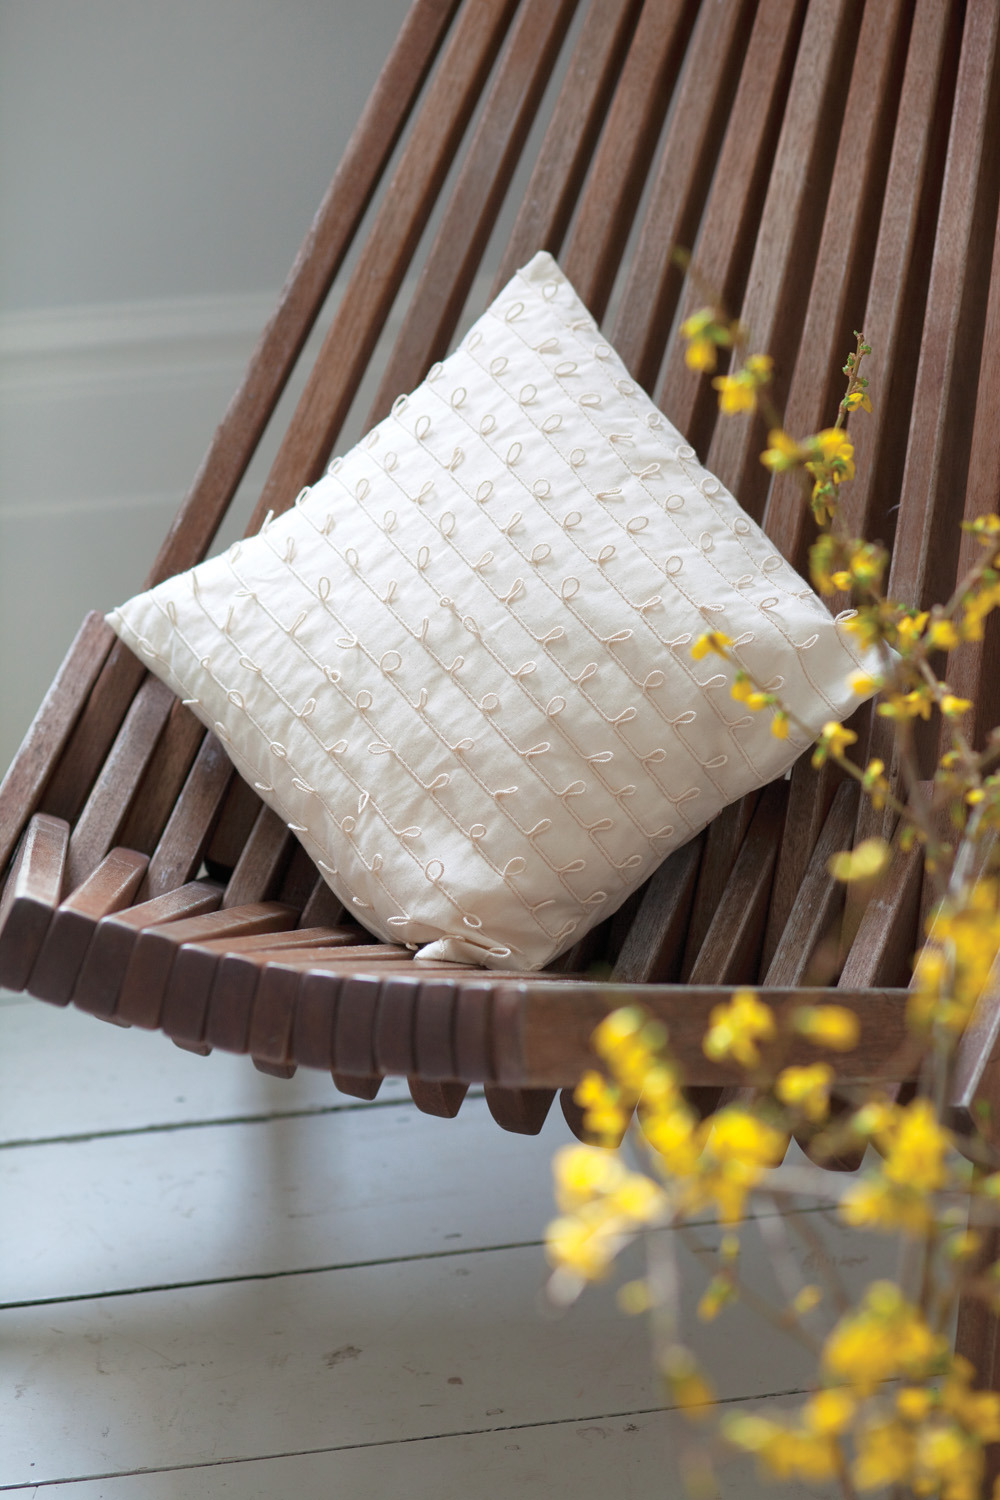
I love the idea of incorporating the techniques into garments. Garments are blank canvases for many of the techniques in the book. I have pattern-cutting and garment-making skills and I suppose if I was to give one piece of advice it would be to make a toile prior to using your chosen fabric. A lot of the techniques are folded, tucked, etc, so youreally need to work out how much fabric the technique needs.

What are you working on now? Can we look forward to more books from you?


Yes, I am working on some other things right now. I am not allowed to say what they are at the moment but, yes, you will see more books by me.


Thanks, Alison! And thanks to all the readers and stitchers who joined our stitch-along!

Stitch Magic Stitch-Along: Smocking

 Hello and welcome to week 6 of our Stitch Magic Stitch-Along! This is our final installment, smocking. I saved this technique for last because it’s always seemed so mysterious to me. I’m happy to say that I now have a novice understanding of how this whole thing works. We’re going to do a honeycomb smocking technique to add to your group of samples. You can follow along on page 115 of Stitch Magic by Alison Reid. The above image of smocked and embroidered melton wool is taken from the book and you can see lots more pictures in the gallery.

Cut a long strip of fabric that is 10” tall by about 30” wide. Make a grid of dots on the wrong side, 1” apart from each other. I made 16 horizontal dots and 8 vertical dots.


Thread a needle with a long strand of all-purpose thread and enter the fabric on the uppermost righthand dot. Using your dots as a guide, stitch a running stitch through your dot pattern, going in at one dot and up at the next.


Pull the threads, two at a time, so that they form even folds.

Secure the thread ends together by placing a pin in the fabric and looping the thread tails around it in a figure 8 pattern.

Now you’re ready to smock! Note: Do NOT do what I did and do your smocking on the wrong side of the fabric, where your dots are. Those are meant to be on the backside. Oops!

Thread a large-eyed needle with 6-strand embroidery floss. Start at the uppermost left fold and enter the fabric from the back. Stitch the two folds together using a couple backstitches. From the back of the fabric, proceed to the 2nd and 3rd folds, moving down a row diagonally. I loved Alison’s illustrations explaining this:


Continue in this way until you’ve smocked the whole grid. Here it is! Pencil marks and all, I still think it's pretty cool.

I love how stretchy and sculptural it is. I’m eager to try this on some garment projects, and Stitch Magic has a great apron with smocked pockets for inspiration.

Well, readers, that concludes our stitching portion of the Stitch-Along. But I have a treat for you! An interview with the author is coming soon, which will wrap up the whole series.

Stitch Magic Stitch-Along: Cording


Welcome to week five of our Stitch Magic Stitch-Along! Today we’re talking about cording, which begins on page 85 of Stitch Magic by Alison Reid. Alison has tons of great ideas for unusual cording techniques. I have to say, today’s exercise was one of my favorites. I’ve been hard at work on my own book and doing this cording experiment was a great reminder of how fun and spontaneous sewing really is! It was just the break I needed.

Let’s start with the technique that the author uses on the awesome pillow pictured above. I was especially drawn to this because I feel like it could be incorporated very easily and charmingly into apparel sewing. Wouldn’t these little loops look adorable around the border of a skirt?

I started by marking my lines on a 10” square piece of scrap fabric. I made lines 2” apart and drew little marks 1-1/2” apart on each line to mark where the loops would occur.

Now grab some cord (I used some natural-colored cotton cord that I had around the house). You can use a cording foot on your machine, but I wasn’t able to get one in time for this post. I started with my zigzag foot, but then found that my buttonhole foot was more effective since it has grooves on the bottom for the cording to pass through. (Mine is a traditional multi-step buttonhole foot, not one of the automatic buttonhole feet.) Zigzag over the cord and when you get to your little marks, stop with the needle down. Lift the presser foot and arrange the cord into a little loop with a twist at the top. Put your presser foot down and continue zigzagging. That’s it!


Here’s my practice version, which I did without marking lines and just improvising. Experiment with less regimented lines and loops!


Next I wanted to try something that was a little more intricate, inspired by this corded blouse tutorial. Get a new piece of fabric and arrange your cord however you please. You can make loops, bows, lines—whatever you want! Pin your design in place. Now stitch it down by hand, using a slip stitch. This means that you’ll take one little stitch out of the base fabric, followed immediately by one little stitch out of the cord. Your stitches should be on the underside of the cord to make them invisible.  Match your thread to your base fabric to help it blend in.

Ta-da! Wouldn’t this be pretty on the neckline of a blouse?


I'm dying to try this with some premade satin cord, which is also called rattail cord. Ooh, I wonder if it comes in metallics?!

That wraps up this week’s stitch-along fun. Next week is our last week—smocking!

P.S. To see lots of images from Stitch Magic, cick here.

Stitch Magic Stitch-Along: Pleats


Welcome to week three of the Stitch Magic Stitch-Along! My apologies for the delayed post this week. I’m writing to you from lovely Cleveland, where I’m filming an episode of a PBS sewing show.

Today we’re talking about pleating, which begins on page 41 of Stitch Magic by Alison Reid. But first, a note: the author uses the terms pleats and tucks to apply to her own techniques, which are gorgeous (like the beautiful throw pillows pictured above). In the sewing community, there have been downright impassioned discussions about the difference in terms. For this sew-along, don’t worry too much about what the “proper” terminology is, but rather focus on how the author utilizes the techniques in her own designs—and how you can customize them for yourself!

Okay, let's dive in. Pleating requires very precise marking and folding, so I’ve only gone over two design samples this week. There are several more techniques in the book to try; I especially like the origami box pleats, shown below.


We’re going to start out with knife pleats, which are flat pleats that are generally uniform in size. Each pleat takes up three times its width. So, for a one-inch pleat, you need to allow yourself three inches of fabric. Make sense?

Start by marking your pleat lines. Mark two-inch pleat sections one inch away form each other. Mark them on the bottom of the fabric as well. Bring one pleat line to the other and pin in place.


To retain the soft, sculptural feel of the pleats, we’re not going to press our sample. (If you want crisper pleats, go ahead and press them.) Now take some six-strand embroidery thread and stitch the pleats down in incremental lines with running stitches.


It’s hard to get a straight line, so mark your fabric with disappearing ink or some sort of tape that doesn’t leave a residue. Masking tape has worked well for me; you might also want to look for Tiger Tape, a quilting notion that has incremental stitch marks along a tape that doesn’t leave any gunk on your fabric. Genius!

Now let’s try another technique. This is a sort of grid, with small projecting pleats in both the horizontal and vertical directions.

Make ¼” pleat marks on your fabric. The pleat marks should be 1-1/4” away from each other.

Fold and pin the vertical pleats. Now, stitch along the side of the pleat that isn’t folded. Next, do the same with the horizontal pleats. But! When you stitch the sections that intersect, pull back the little flap to form a sculptural detail. Your presser foot will want to do this naturally anyway, so you’ll only need to help it along a bit.

My sample got a little crooked at points (See? Marking well is so important!) but I still like how it looks. In fact, it reminds me of the bodice of a designer dress I saw recently. Zac Posen, anyone?

I hope you’ve enjoyed a look at Stitch Magic’s pleating techniques! Next week we’ll be trying cording, which is completely new to me. If you can, get yourself a cording or braiding foot for your machine. This isn’t crucial though—methods with a regular presser foot as well as hand stitches will be shown.

Stitch Magic Stitch-Along: Pintucks

 Welcome to week 2 of the Stitch Magic Stitch-Along! Today we’re talking pintucks, a beautiful design detail to add texture and interest to your sewing projects. This chapter begins on page 55 of Stitch Magic by Alison Reid. Do check it out, as there are tons of great ideas plus two beautiful projects—a table runner and a very cool tote bag.

First, let’s talk about the method that the author uses, which is a twin-needle pintuck with a special pintuck foot on your sewing machine. (Don’t worry if you don’t have these supplies, I’ll give you hand and machine alternatives later in this post.)

Pintucking with a Twin Needle and a Pintuck Presser Foot 

Install the foot and needle in your machine, and thread two spools of all-purpose thread in your upper thread mechanism. (Yes, I just wrote the word thread three times in a sentence. It couldn’t be helped, I’m afraid!) It’s just like threading as normal, but with two strands, which then go into the two separate needles. You can use different colored threads if you like, which will give you a different color of stitching on each side of your tuck.

Grab some test fabric. I’m using 10” tall strips of muslin that I can cut down into 10” squares once I’m done experimenting. (The idea is that we’ll have a bunch of 10” samples at the end of the Stitch-Along. For this exercise, you need to cut the squares down to size after stitching, since the tucks make the fabric smaller. Make sense?)

Now, just sew as you normally would! Start by sewing down the lengthwise grain of the fabric in rows. A tuck forms in the groove of your foot as you sew. When you go on to the next tuck, your first tuck should go into a parallel groove on your foot to keep the tucks evenly spaced.

Try making groups of tucks. 


Experiment with printed fabric too. I’m using a beautiful floral silk organza here. Make perpendicular groups of tucks for a plaid effect. I love this look! I will definitely be doing this when I finally make this fabric into a dress.

Next, try some creative loops and curves. When you’re using a pintuck foot, you don’t have to tuck along a straight grain. Go crazy! This would be a fun effect for whimsical home décor, especially in a child’s room. 

You can try all sorts of experiments with your pintuck foot: using stripes, prints, curved tucks, and different spacing options. Have fun!

Machine Tucks with a Single Needle

You don’t need a twin needle and pintuck foot to make pintucks. In fact, “authentic” pintucks (such as those used in historical costumes and heirloom sewing) are made by pressing the fabric in a fold and sewing along the fold with a single needle. This method is best used only on the straight grain of the fabric.

Start by marking your line with chalk or disappearing ink and then press the fabric on your line. Stitch 1/8” (or however far you choose) from the fold. Press the tuck to one side. That’s it!

Try groups of pintucks. To get evenly spaced tucks, mark all the lines on your fabric first, before you begin tucking. The distance between the lines should be the desired width between tucks plus two times the finished tuck width.

You can try bigger tucks too! (Though these aren’t technically pintucks anymore, just regular old tucks.) I had a dress from Anthropologie that had a series of big tucks placed horizontally around the hem. It was so cute! I tried out a 5/8” tuck on the bottom of my sample below. 


Pintucks by Hand

 You can also recreate this effect by stitching along the fold by hand rather than machine. Use the technique above, but substitute a running stitch by hand for the machine stitching. Use tiny stitches and press to one side.

Aren't pintucks fun? I can't wait to incorporate them into some garments. To do this, you'll likely want to pintuck your fabric first, and then cut out your garment pieces.

I hope you’ve enjoyed this installment of the Stitch-Along. How are your samples going?

Stitch Magic Stitch-Along: Quilting

Welcome to the first week of the Stitch Magic Stitch-Along! This week's theme is quilting, which begins on page 70 of the book Stitch Magic by Alison Reid. The book shows you several examples of hand and machine quilting and incorporates them into inspiring projects like a beautiful chair cushion and adorable egg cozies.

Here, I've taken the author's methods and practiced some of them exactly as written (like diamond quilting and tuft quilting with scraps), and also devised a few of my own exercises, like channel stitching and zigzag quilting, two techniques often used in clothing. If you’re a garment sewer like me, it’s tempting to write quilting off and never learn to do it! But quilted effects are not only great for home décor, they’re a staple of modern designer garments and vintage pieces alike. (See my quilted garment inspiration post for lots of ideas on how to incorporate quilting into fashion sewing.)

Now, on to the techniques! First you’ll need to prep your fabric squares. (If you'd like to read up on the prep process, Stitch Magic goes into a lot of detail on pages 74-75). Start by cutting eight 10” squares of muslin or other cotton fabric. Pink the edges so they don’t fray.

Now cut four 10” squares of your thin cotton batting. Sandwich the batting squares between two pieces of your cotton fabric and pin to secure. Now we’re going to hand baste the layers together so they don’t shift when we quilt them. Thread a needle with a single strand of all-purpose sewing thread. Start by making big diagonal running stitches from one upper corner to a lower corner. Repeat these lines of stitches in regular intervals. Now, do the same thing in the other direction. I used a different color thread so you can see my second direction of basting. As you can see, neatness doesn’t really count here! These are temporary stitches.


Now we’re ready to quilt! We’re going to start with some simple channel-stitching and diagonal quilting by hand. Prepare your square by marking it with a disappearing ink pen or some other removeable chalk. On the upper half of the square, draw about 7 parallel lines ¼” away from each other. On the bottom half of the square, make a 1” grid of diagonal lines. 

Now we’re ready to try some channel stitching. This just means simple rows of stitching ¼” away from each other. (I’ve been in love with channel stitching ever since I saw it on a beautiful Diane Von Furstenberg dress a couple years ago. It was a glorious bright red wool jersey with a full circle skirt and a wide midriff band with channel stitching.) Load a large-eye needle with some embroidery thread and make a running straight stitch across your lines. Here's what the running stitch looks like in process.


Now make the running stitch along your marked lines. Try to make your stitches as even as possible. Experiment with different effects by using fewer strands of embroidery floss. I started with 6 and then split the thread down to 3, 2, and 1 strands as I went up my lines. It gave a cool pseudo-ombre effect.


You can mark the back of your sample with the thread used (or any other notes) to remind yourself!

 Now for the diagonal quilting. Again, we’re just using a simple running stitch, but this time we’re quilting along our diagonal lines. I used 6 strands of embroidery floss for all of my lines here, but played around with two different colors to achieve an argyle effect.


Isn’t your sample pretty? 


Next, you can try the exact same exercise with machine quilting. I used regular all-purpose thread in my machine and used a 3.5mm straight stitch and a straight stitch presser foot. Make sure that you smooth out the square as you quilt to avoid puckers. 


Now you can play around with different patterns if you like. I was eager to try some zigzag quilting. I drew one big zigzag on the upper half of a new square. Then I quilted the line by machine (you can do it by hand if you prefer). Next, I used the edge of my presser foot to make ¼” lines that echoed the first zigzag. 


I found it a little difficult to get perfect lines using my presser foot edge, so  next I did a ½” zigzag pattern, making each line with disappearing ink before quilting. 

This is my favorite sample I think! I would love to make an entire circle skirt quilted in this pattern.

Last, you can try a fun effect that incorporates tiny fabric scraps and tufts made by tying off embroidery thread. Start by cutting small squares of two different fabrics, one a bit bigger than the other. I did my tiny squares in blue ultrasuede and my slightly bigger squares in a cotton print. 


Layer the squares on top of each other and arrange them on your fabric square. Load a needle with embroidery thread and stitch down and back up through each square. Tie the embroidery thread in a knot and cut it off at about ¼” for cute little tufts. 

 This would be really cute on a pillow, don't you think?

That’s it for this week, stitch-alongers. Next week we’ll be doing pintucks, which we’ll also do both by hand and machine. I’ll also discuss the pintuck presser foot and twin needles.

Happy stitching!

Gertie at STC Craft: A Stitch-Along!

While I’ve been gearing up to do some ribbon embroidery from the new Alabama Chanin book, I’ve also been thinking of ways we can make my posts here more interactive. And what better way than a little sew-along? Or rather, a stitch-along! I’ve been reading the book Stitch Magic by Alison Reid and it has tons of fun ways to spruce up your sewing. I can’t stop thinking about adding pintucks, pleats, and cording to my projects. Being a lover of vintage fashion, I see these details all the time in gorgeous dresses but have never taken the time to properly learn the techniques.

So here’s what I propose: each week we will do a little stitch sample trying out one of the techniques. I’ll guide you through the how-to and give you inspirational ideas for adding these flourishes to your handmade garments. At the end of the stitch-along, you’ll have a little sample book of swatches to refer back to!

The standard supplies needed will be thread, hand-sewing needles, and some cotton fabric. If you have a sewing machine, that's great. If not, I'll give hand-stitching options for each technique. Here’s what I’m thinking for the schedule (with special supplies needed in parentheses):


Week of 7/ 25: Quilting (six-strand embroidery floss, batting)

Week of 8/1: Pintucks (twin machine needle, pintuck foot helpful but optional)

Week of 8/8: Pleating

Week of 8/15: Cording (cotton piping cord, cording foot optional)

Week of 8/22: Smocking


Are you in? What do you think? Personally, I think this is going to be great fun! Please leave any questions in the comments.


The SSSQ Quilt-Along: June Update from Kaffe and Liza

Welcome to the third month of the SSSQ Quilt-Along with Kaffe Fassett and Liza Prior Lucy! We’ve been so impressed by the quilts in progress (not to mention Kaffe and Liza's brilliant advice and the enthusiasm of the participants) that we've extended the SSSQ Quilt-Along until July 31, 2010.

If you’re not quilting with us yet, now is a great time to begin. Click here for Quilt-Along details, including a free pattern from Kaffe Fassett’s Simple Shapes Spectacular Quilts.

In this month’s Quilt-Along post, Kaffe and Liza offer their thoughts on the Quilt-Along so far and what they hope the next two months will bring. Scroll down to see some of the quilts in progress and check out all the gorgeous projects in our Facebook photo gallery. And now some words from the masters themselves...

From Kaffe:

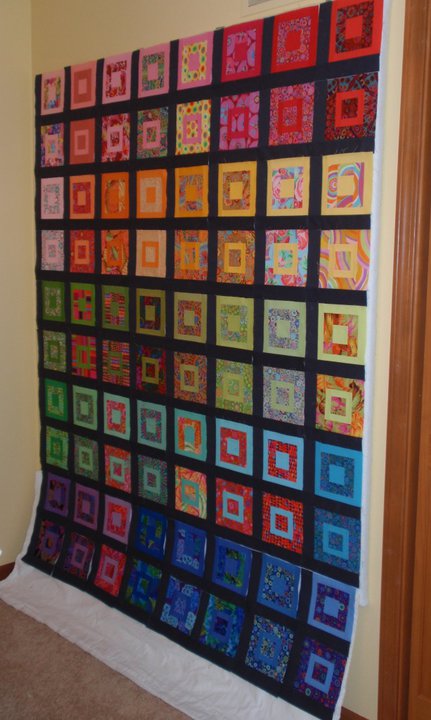
"All I can say is more of the same exciting creativity, please! I love seeing works in progress and it’s very satisfying to see finished pieces with such exciting use of colour. What a stimulation it has been for me to see how many creative people are beaver-ing away in their own corners of the world. How good to see that some of you move away from the computer to make something! Thank you for the ongoing show."

The striking multicolored quilt at right artfully combines fabrics designed by Kaffe. So who better to give feedback than Kaffe himself?

"This dark grid and keeping all the elements of your graphic design constant you are really showing the variety of fabrics to advantage and getting a lot of punch from your colours."

From Liza:

"The Facebook Quilt-Along has been great fun so far. It is wonderful to see how many quilters are encouraging others with their generous comments. Over the next two months, I hope more people will post pictures of their works in progress. As much as I love to see the finished quilts, I really love seeing the ones that develop before our eyes. It is the exciting part of our classes when the design walls start to fill in and the quilts begin to bloom."

This creative take on the Striped Donut pattern from Simple Shapes Spectacular Quilts (shown at left) earned kudos from other Quilt-Along members.  Liza’s comment says it all:

Brilliant idea.

Some quilters started from scratch, while others revisited old projects (see right). Liza dispensed sage advice that any discouraged crafter should take to heart:

"...join the club! Sometimes you just need to walk away from a project for a while. Often when you go back to it, you find you like what you did."

By the way, did you know that Liza's preference for wildly patterned textiles is actually a family tradition? Click here for the full the scoop (and a priceless photo!).

As Kaffe and Liza tell all their students, they LOVE seeing quilters make their own color and pattern choices. One quilter began with the Haze Kilim project from SSSQ and created a "chintzd Up" version of her own.

Here's the quilt from Simple Shapes Spectacular Quilts. And here's the unique (and gorgeous!) variation.


The designs in Simple Shapes Spectacular Quilts are inspired by geometric forms found in the everyday world. We challenge you to discover the colors and basic shapes around you. 

Quilt-Along members have mentioned marble floors, jewels, and fern trees outside a kitchen window as inspiration. Dream up a quilt inspired by your own world, then share your project with the group. 

Thanks to everyone for all of your brilliant contributions so far!

Kaffe Fassett's Simple Shapes Spectacular Quilts Blog Tour!

We've sure been keeping Kaffe Fassett and Liza Lucy, authors of Kaffe Fassett's Simple Shapes Spectacular Quilts, busy lately! They've barely kicked off their US tour-trotting shoes and have already tackled our first round of Quilt-A-Long questions.

Good thing they are a hardy pair, because not only will they be offering their inspiration, encouragement, and advice here on the first Tuesday of every month (last date, July 6th!); they are also extending their wisdom and influence to our friendly neighborhood blogs! Follow their wild ride through the blogosphere below, and be sure to get your free pattern and Quilt-A-Long badge and link to our Quilt-A-Long Facebook group from here!


May 3: Quilt-A-Long Begins! http://www.melaniefalickbooks.com 

May 6: Review http://to-be-charmed.com

May 7:  Kaffe and Liza’s Top Ten Quilting Blogs http://quilting.craftgossip.com

May 10: Review and “Liza Lucy Stories!” http://goknitinyourhat.blogspot.com

May 11: Podcast Interview with Kaffe and Liza http://www.PatSloan.com

May 13: How the "Kaffe Fassett Collective" designs together http://whipup.net   

May 14: Choosing Colors www.knitgrrl.com

May 17: Art vs. Craft http://www.thisisloveforever.com

May 18: The Question of Dabbling http://www.yarnstorm.blogs.com

May 19: Choosing Patterns http://www.houseonhillroad.com

May 20: Interview http://sewmamasew.com

May 21: Review http://www.ohbara.com

May 25: Review http://usineurope.typepad.com

May 27: Why a Design Wall and Reducing Glass http://thelastpiece.typepad.com  

May 28: Interview: Tradition Today http://www.materialobsession.typepad.com

May 31: Interview http://thelongthread.com

June 1: Kaffe and Liza's Quilt-A-Long

June 2: Review http://quiltersbuzz.com

June 3: Quilt-A-Long Sharing http://blog.fatquarterly.com

June 4: Review http://www.trueup.net

June 7: Review http://bemused.typepad.com

SSSQ Quilt-Along with Kaffe--A Q&A with Kaffe and Liza


The SSSQ Quilt-Along with Kaffe Fassett is in full swing. Click here for full details, plus a free pattern from Simple Shapes Spectacular Quilts to get you started. Join the SSSQ Quilt-Along group on Facebook here

Authors Kaffe Fassett and Liza Prior Lucy are on board to provide inspiration, encouragement, and advice. Visit our blog the first Tuesday of every month for a special post from these superstar quilters. If you can't wait that long, check in on their blog tour for near-daily inspiration!

Today's post from Kaffe and Liza takes on the beginning stages of a project. Absorb their words of wisdom--then swap some of your own tips in the SSSQ Quilt-Along group forum.

Were any of your quilts inspired by something/somewhere interesting or unusual?

We are primarily inspired by traditional quilts. We don’t do reproductions but rather put a contemporary spin on old patterns. Some of our quilts are inspired by textiles that are not quilts: African wovens such as Kente cloth, Suzani textiles from the Central Asia, Kantha embroideries from India and Bangladesh.

The Haze Kilim quilt in Simple Shapes Spectacular Quilts is a good example of what happens when we are inspired. Kaffe bought a simple kilim rug for his house in the late '70s. His first book on knitting included a design for a coat inspired by the rug, which was the first of Kaffe’s designs Liza knitted. Many years later, when she first proposed doing a quilt book with Kaffe, she attempted to make a version of the coat but failed, mostly because the fabrics available just didn’t work. Three books later she was still stubbornly holding onto the idea of doing that pattern. With Kaffe’s fabrics expanding in palette, it became possible. The pattern went from woven rug, to knitted coat, to quilt.

What is your favorite part of beginning a new quilt?

Color is always the most exciting part. Once we chose a pattern to try, usually a traditional one, going to the stash and beginning to build the palette is thrilling. It gets even better when we start to cut the fabric and place the cut pieces on a design wall to see how or if the color harmonizes.

What should beginners keep in mind when starting their first quilts? What might they find intimidating and how can they overcome that feeling?

We can’t emphasize enough how important it is to cut well ironed fabric using a sharp blade and good rulers. We are not sticklers about perfect points and matching corners, but cutting well makes it possible to get very good piecing results. Practice rotary cutting until it becomes second nature!

When choosing a palette, beginners often choose too many different colors. Stick to just two colors to begin with and then expand from there. For example, choose red and green to make a quilt, then for reds, choose from the red family going to purple and almost orange; from green, do the same, going from teals to chartreuses. A good example of this would be the Floral Snowball quilt from Simple Shapes Spectacular Quilts(image at right).

One absolute must is a design wall. We mock up everything on our design walls. We arrange and edit and rearrange a pattern for days until it is as perfect as we can make it. Using a reducing glass to view the composition is essential.

How do you record your inspiration for future quilts (i.e. photos, drawings, written notes, etc.)?

We toss ideas to develop in the future into a big plastic sleeve. The sleeve is full of pictures, sketches, and comments. Inspiration is everywhere.

To find out more about Kaffe Fassett's Simple Shapes Spectacular Quilts, click here.

For more inspiration, watch this thought- and, hopefully, quilt-provoking book trailer.

For even more words of wisdom, reviews and show-and-tells from crafty bloggers, check out the blog tour.


Announcing the SSSQ Quilt-Along with Kaffe Fassett


To celebrate the publication of Kaffe Fassett's Simple Shapes Spectacular Quilts, Kaffe and co-author Liza Prior Lucy embarked on a U.S. book tour (details here) to great success! Now they are embarking on a virtual tour, and visiting us monthly for an exciting event! Announcing...


The SSSQ Quilt-Along with Kaffe Fassett! 

What exactly is a quilt-along, you ask?  It's an online quilting bee. Take part in a modern spin on this age-old tradition by joining the SSSQ Quilt-Along with Kaffe Fassett Facebook group and connect with fellow quilters in locations near and far, all while piecing together your own project from beginning to end.

Along the way, share photos of your work for a chance to get direct feedback from Kaffe and Liza.  You might even be the lucky winner of our SSSQ Quilt-Along with Kaffe Fassett Giveaway.

Quilters of all levels are invited.  Creativity is all that's required. 

For Quilt-Along details, plus a free pattern from Simple Shapes Spectacular Quilts, click here.